Showing posts with label rug punchneedle. Show all posts

Monday, April 9, 2012

bumble bee rooster & other wip updates

A few months ago I got this little rug hook kit from Lori Brechlin's shop in Amherst.  I'm sorry to not give credit to the designer but typically enough, I can't find the bag it came in or my receipt.   Anyway, got it home and finally took it out of the stash pile a few weeks ago.  Rug hooking is pretty new to me and I've never hooked on wool before, which this is, and my rug hook needle turned out to be one for fine rug hooking.  Another obstacle that made me put it back in the box for a while was the fact that there was no photo to guide me with colors.  The kit included wool strips that were wrapped in a bundle-- one for background, one for rooster, but there wasn't a photo for the finished rooster so I am guessing, and now, tossing colors I didn't like and using cut strips from my wool stash.  A new primitive rug hook I got at VA Rugfest a few weeks ago has made me pick up the project again but I am still stymied with color decisions.  Agh!  This shouldn't be hard, right?

Since my previous hook didn't do anything but pull the wool background and shred the wool strips, I switched to the rug punch.  So the outline and rooster head are made with punching but the strips were too wide for the punch so with an outline to guide me, I turned it over and am now hooking.  I've looked at a bunch of rooster photos online and thought yellow would look good in the tail.  Maybe not, as my husband proclaimed it the "bumble bee rooster".  What do I know, I've never lived on a farm.

But I really like how the head turned out, except for one strip that popped out on top.  Whoops.  And I like the green tail but the bumble bee yellow/black has to go.

Possibilities for colors are above.  More mixes of green for the tail?  Orange in the tail?  Orange breast?  Hmmm...  orange feet, maybe.   Going with the flow is not my strong suit...  Stay tuned on this one.

More up my alley- progress on the Lesage tambour piece.  I've gone crazy pants on this piece in the last day and it is almost done.  This is a side view looking down on my frame from where I sit.  All the chenille leaves are completed except for one (you can kind of see it on the far right, the one that still needs stitched) and all goldwork & tube beads are finito.  The end is in sight in a day or two on this piece and then it's coming off the frame and something else is going in.  I'm anxious for my "Ta-da!!" moment here.  It has many tiny parts that needed stitched, and is fairly equal measure tambour and straight embroidery, plus I had the challenge of finding a suitable metallic gold thread that is a different brand that what I got in Paris, after I ran out of the Parisian metallic gold.  That thread I have to order and shipping is 23 euros, just for shipping!  So a wait is in order and after a city-wide search for the perfect color match and durability test, I found it in the most unexpected thread-- Coats & Clark.  Inexpensive and perfect and super strong.   With this thread, I finished up the stems and one gold leaf.  I can't tell the difference, so I am excited to have discovered this.  They had a number of metallic colors, too, at Joann Fabric.

Back to the rooster, though.  I really want to get this one finished.

Tuesday, March 27, 2012

Woo-hoo, a finish! Sheep rug punch needlebook!


I am a big fan of Primitive Betty's blog.  A few weeks ago I saw that she had been given a needlebook by Ginger of http://primitivesbythelightofthemoon.blogspot.com.  It was an adorable rug punched sheep on the front and equally sweet lettering that spelled W o o l and a cute heart on back.  I don't know Ginger but I wrote her on her blog and asked her if there was a pattern for this needlebook she could direct me to or I could buy from her.  Very kindly she wrote back right away and not only told me that the design is from a Frank Bielec class but she had written him permission to send me the pattern on email and so she did.  

My first attempt at rug punch.  I used an Oxford punch needle #10 1/4".  It looked very intimidating at first but once I got the fabric taut on the frame it was pretty easy going.   I changed some of the yarn from what I saw online originally.  The sheep was punched with a sweet fuzzy acrylic/wool blend I got at Joann Fabric.  The rest was 100% wool in various thicknesses.  Finding a consistency with the spacing of the punches that jived well with the weight of the yarn took a bit of frogging but I'm happy with the end result.  The blue sky really pops and the sheep is super fuzzy!


Front cover of needlebook on the reverse.  This is the side that you punch-- the loops are on the reverse, just like with miniature needle punch.  This was punched on monks cloth I got in bulk when I had a discount from working at a quilt shop several years ago.


This is the back of the piece.  Test strip is on the right!  The heart was not on the original pattern but was on Ginger's and I loved that so much I put it on mine, too.


Reverse of back side.  The letters were punched in each hole to make them stand out more.  I think I should have used a thicker wool yarn for the letters, too, but oh well.   Learning curve!

And then there was nothing to finish but the finishing so of course it sat around for a few weeks before I tackled it.  Again I have to thank Ginger for her spectacular tutorial on her blog of how to finish a hooked rug because I used the principles she documented for this piece and it was so easy!  First, cut the monks cloth to a half an inch the whole way around the piece.  Then get some thread (I used heavy duty Coats and Clark), fold the cloth over and make a running stitch around it.  The ends were folded in like when finishing a big rug.


The Virginia Rugfest was this past weekend in Mechanicsville, VA and I had the pleasure of stocking up on Rebecca Erb's delicious wool, as well as Norma Batastini.  This was from Norma's booth and I used it as a cover for the insides of the front and back of the book.

Using the same wool yarn as on the back cover of the book,  whip stitch around the entire perimeter of the book, piercing the wool on one side and up to the stitch line on the other side to cover the exposed monks cloth.

All whipped and ready to go!  Hmmm... now what??


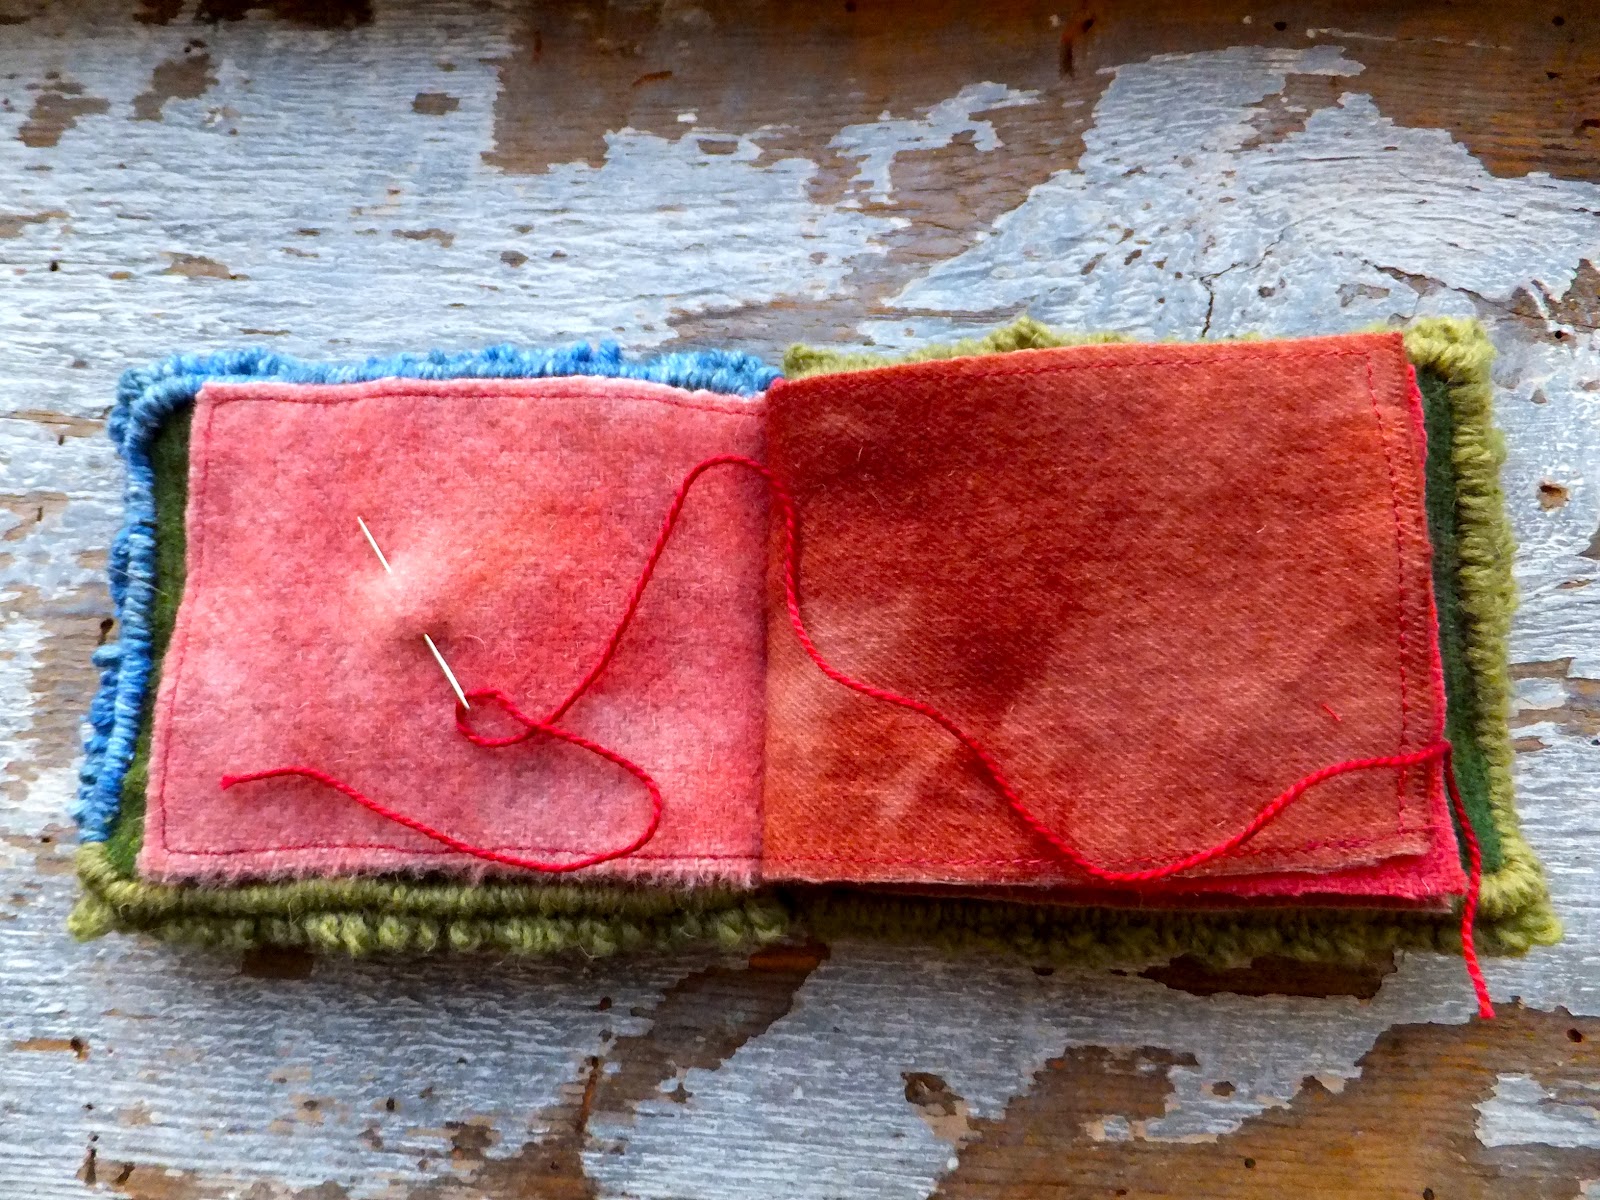
Well, I didn't document it but what I need is a book that holds a big variety of needles.  So I wanted a thick book and used three pieces of wool in various shades of red, rose and terra cotta, cut them slightly smaller than the length/width of the book, machine sewed each piece of wool around the edges to keep it from fraying and then sewed it down the middle of the middle.  Then I whip stitched the front cover to the back cover with red yarn, same as from the heart (just in the middle, though, so the book would lay flat).  Then hand sewed a few stitches in the divided middle of the layers of wool, just enough for it to be still flexible, and buried the thread in the whipped wool.  WHEW!  Seriously, it seemed like this project took F O R E V E R but it was great to learn something new, experiment with fibers, and it was really super fun to make!  The finished book is about 5.5"x 4.5" and is piled 2" high without needles in it.
Rug punch and wool sandwich!

 Needs more needles!!

Wednesday, March 14, 2012

A rose is a rose...

This rose was the June 2011 class tambour embroidery piece when I studied with Bob Haven at the University of Kentucky.  Several pieces of the rose and one rose leaf were constructed independent of the main embroidery. In other words, it was all stitched with the tambour hook and then several parts were cut out of the fabric, web fused and stitched down to create a three dimensional look to the piece.  Unfortunately I did not document that process of the piece.  The leaf on the top right has a small line of green jewels tambour stitched down.  During this class is when I learned the infamous pulled stitch.  The green cotton thread just under the flower  and the light red cotton above the pink sequins on the rose are all pulled stitch- easy once it is mastered but difficult to learn at first.

A close up of the bud.


 A close up of one of the leaves.  This was quite fun to stitch up.  Bob's class is again in June for master class but I am not sure I am going to be able to go since the Royal School of Needlework has a class in illuminated lettering in goldwork and silk shading that I have my eye on quite seriously.  What to do...

Here is a lovely shot from our apartment window of the lovely trees in full Springtime blossom.  We love walking our beautiful neighborhood this time of year, even though it is unseasonably warm, like everywhere else, but the flowers!  A house near our building has my favorite daffodil and I don't know if they are subspecies or what but the blossoms are HUGE.  It's all I can do to keep myself under control to pick some and run home with them.  Next week I hope to have alot more progress to show on my Lesage piece. I got quite a bit done last night.  Also I will show a finish on another of my favorites- rug punch needle- finished into a needlebook.  Not enough hours in the day...